When designing an interior area, pay close attention to the little things. The mood of a room is made up of the lights, the furniture, and everything else in it. Ceiling roses are an important part that doesn’t get enough attention. These decorative pieces not only make a room more interesting, but they also help people look up.
Plaster Ceiling Rose stands out due to its adaptability and classic good looks. Here, you will take a look at the many ways in which plaster ceiling roses can improve your home’s aesthetics and functionality. You will also learn the most effective and seamless way to install it.
Unique Features of Plaster Ceiling Roses
Plaster has been used in building and interior design for hundreds of years because it can be shaped and molded into complex patterns. Ceiling roses are made with the same care as any other kind of ceiling decoration.
Also, plaster can be shaped and sculpted to fit any style or aesthetic, whether you choose a subtle, modest pattern or a more intricate motif. Any kind of interior design can be complemented by a plaster ceiling rose, whether it has a classical motif or a modern design.
These are the special things that a plaster ceiling rose has to offer:
Versatile Design
One of the best things about plaster ceiling roses is that they can be used in a lot of different ways. Unlike pre-made roses made of polyurethane or another material, plaster roses can be shaped to fit your exact needs. When working with clay, you can be as creative as you want, whether you’re fixing up an old house or updating a modern space.
Patterns can be anything you want them to be, from traditional flower designs to more modern geometric ones.
Enhanced Architectural Details
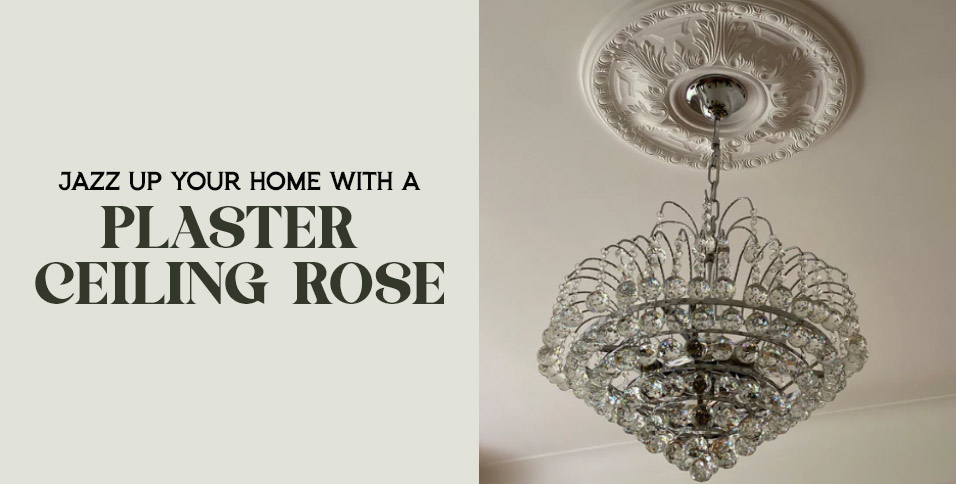
Plaster ceiling roses not only improve the room’s architecture but also make it look better. Even though the space is small, they make the ceiling stand out and give a sense of height and grandeur. Furthermore, other architectural features, like crown molding or chandeliers, can be accentuated with ceiling roses to create a harmonious and unified design plan.
Create a Timeless Elegance
Even in this age of quickly changing styles, plaster ceiling roses will always look good. Trends and fads come and go, but they will always look beautiful in any room. Ceiling roses made of plaster are classic and will never go out of style. This makes them perfect for renovations or bringing a touch of the past to a modern room.
Taking good care of them can make your home more valuable and give you memories to remember for a long time.
How to Install Plaster Ceiling Rose to Upgrade Your Space
Plaster ceiling roses may need to be put up by a professional, but the result is worth it. But if you know how to do it yourself, you might want to know how the whole application process works. That being said, here’s how to do it:
Ceiling Measurement
Before building a plaster ceiling rose, measure the ceiling accurately. This ensures the ornamental fitting is properly fitted and aligned. Measuring the ceiling begins with finding the center place for the ceiling rose. You can use a measuring tape to know the center point of each wall for symmetrical placement. That way, you can ensure identical measurements.
Also, consider how ceiling fans and lighting might affect the location. Verifying dimensions before proceeding is essential to placing the plaster ceiling rise correctly.
Locate the Midpoint
You must mark the ceiling’s center point to position and install the plaster ceiling rose. Find the middle of each wall with a measuring tape and mark it with a pencil. Next, draw two lines intersecting at these midpoints with a laser level or chalk line. You can meet in the ceiling’s middle. Make sure the measurements are accurate twice.
Once you find the middle, mark it with a little nail or tack. This process will arrange your plaster ceiling rose symmetrically and optimally.
Cut Out the Hole
The plaster ceiling rose should fit tightly and blend in with the ceiling after the hole is cut. Completeness and accuracy are needed for this technique. The ceiling rising diameter can be used to compute the hole size.
A tidy and accurate aperture can be achieved by penciling in the ceiling rose location. In the circle you just produced, drill a tiny pilot hole to start the saw. When cutting the hole, maintain the saw level and move smoothly to avoid splintering the ceiling. Then, sand rough edges and test fit the ceiling rose before fixing it after cutting the hole.
Construct a Base Support
A strong support system is needed to anchor and stabilize the plaster ceiling rose in the ceiling area. Support is usually added using a metal or wooden brace between the ceiling joists. This brace supports the plaster ceiling rising and protects it.
Attach the rose to the bracing with screws or construction adhesive for further stability. A snug and secure fit requires measuring and trimming the brace to the rose’s measurements. This DIY installation requires precision and attention to detail.
Put on Glue for Proper Attachment
Carefully applying adhesive to the plaster ceiling rose back secures it to the ceiling. This method requires a strong adhesive like construction or polyurethane glue to maintain the bond. Before applying adhesive, dust and debris must be removed from the ceiling and plaster ceiling rose.
Place the plaster ceiling rose level and centered after applying adhesive. While the adhesive sets, gently press the plaster ceiling rose into place per the manufacturer’s instructions. This process will precisely and securely build the plaster ceiling.
Position the Ceiling Rose
To make your plaster ceiling rose look balanced and lovely, position it precisely in the ceiling area. Start your installation in the ceiling’s center. The room and ceiling rose should be measured to determine the position.
Mark the rose’s attachment points with a pencil to ensure it matches the existing light fittings. Apply a strong adhesive to the back of the rose and carefully push it onto the ceiling for a few minutes to dry. This secures the ceiling rose.
For a lovely finish, align the plaster ceiling rose parallel to the room’s features and explore creative patterns.
Secure Placement of the Ceiling Rose
There are certain ways to secure the plaster ceiling rose to the ceiling to ensure its stability and lifespan. Assessing the ceiling material is the first step in plaster ceiling rose construction.
This will determine what equipment is needed. Remember that surfaces require different levels of security. Commonly needed are a drill, screws, and a strong adhesive.
When attaching the plaster ceiling rising, make sure its attachment points match the ceiling’s structure. This provides ample installation support. Screws or hooks that match the ceiling material are also important. This ensures safe and long-lasting installation.
Apply Finishing Touches
A plaster ceiling needed careful finishing to be more ornate and lovely. You can use fine-grit sandpaper to softly smooth rough edges and imperfections. Then, apply plaster primer after smoothing the surface to ensure the paint sticks evenly.
Choosing high-quality paint in a color that matches the room’s furniture is crucial. Use a small, angled paintbrush and steady hand to highlight the ceiling rose’s intricate details. For a luxurious look, accentuate fine features with metallic or iridescent paint. Buff dried paint with a soft cloth for a professional gloss.
Elevate Your Home’s Style with Plaster Ceiling Roses
Plaster ceiling roses are a classic and sophisticated choice for any house. Both homeowners and interior designers love them for their beauty, adaptability, and how they can bring out the best in architectural details. Plaster ceiling roses allow for endless individuality and inventiveness, whether you’re decorating a modern room or an old house.
Also Read: Unlock Unique Stays: Your Guide to Holiday Accommodation Choices
Our Magazines →